Payments Quickstart Guide
Getting integrated is fast and easy.
1. Sandbox Setup
Signing up to Sandbox is the fastest way to get up and running. Sandbox is a test account for you to set started quickly without compliance checks or processing real money.
Create API Key
You can access the API key from the dashboard.

Production vs Sandbox
API keys are environment-specific, you will have a different API key for your Sandbox and Production instance. When you have thoroughly tested making payments on Sandbox, you are ready to use your production environment.
The base URL for the API depends on the environment:
- Sandbox: https://sandbox.gigwage.com/api/v1
- Production: https://app.gigwage.com/api/v1
2. Authentication
Add authentication headers to each API request.
request['X-Gw-Api-Key']   = api_key
request['X-Gw-Timestamp'] = timestamp
request['X-Gw-Signature'] = signature
var headers = {
  "Content-Type": "application/json",
  "Accept": "application/json",
  "X-Gw-Api-Key": api_key,
  "X-Gw-Timestamp": timestamp,
  "X-Gw-Signature": signature
}
Go to the Authentication Summary to learn more about error responses.
3. Fund your account
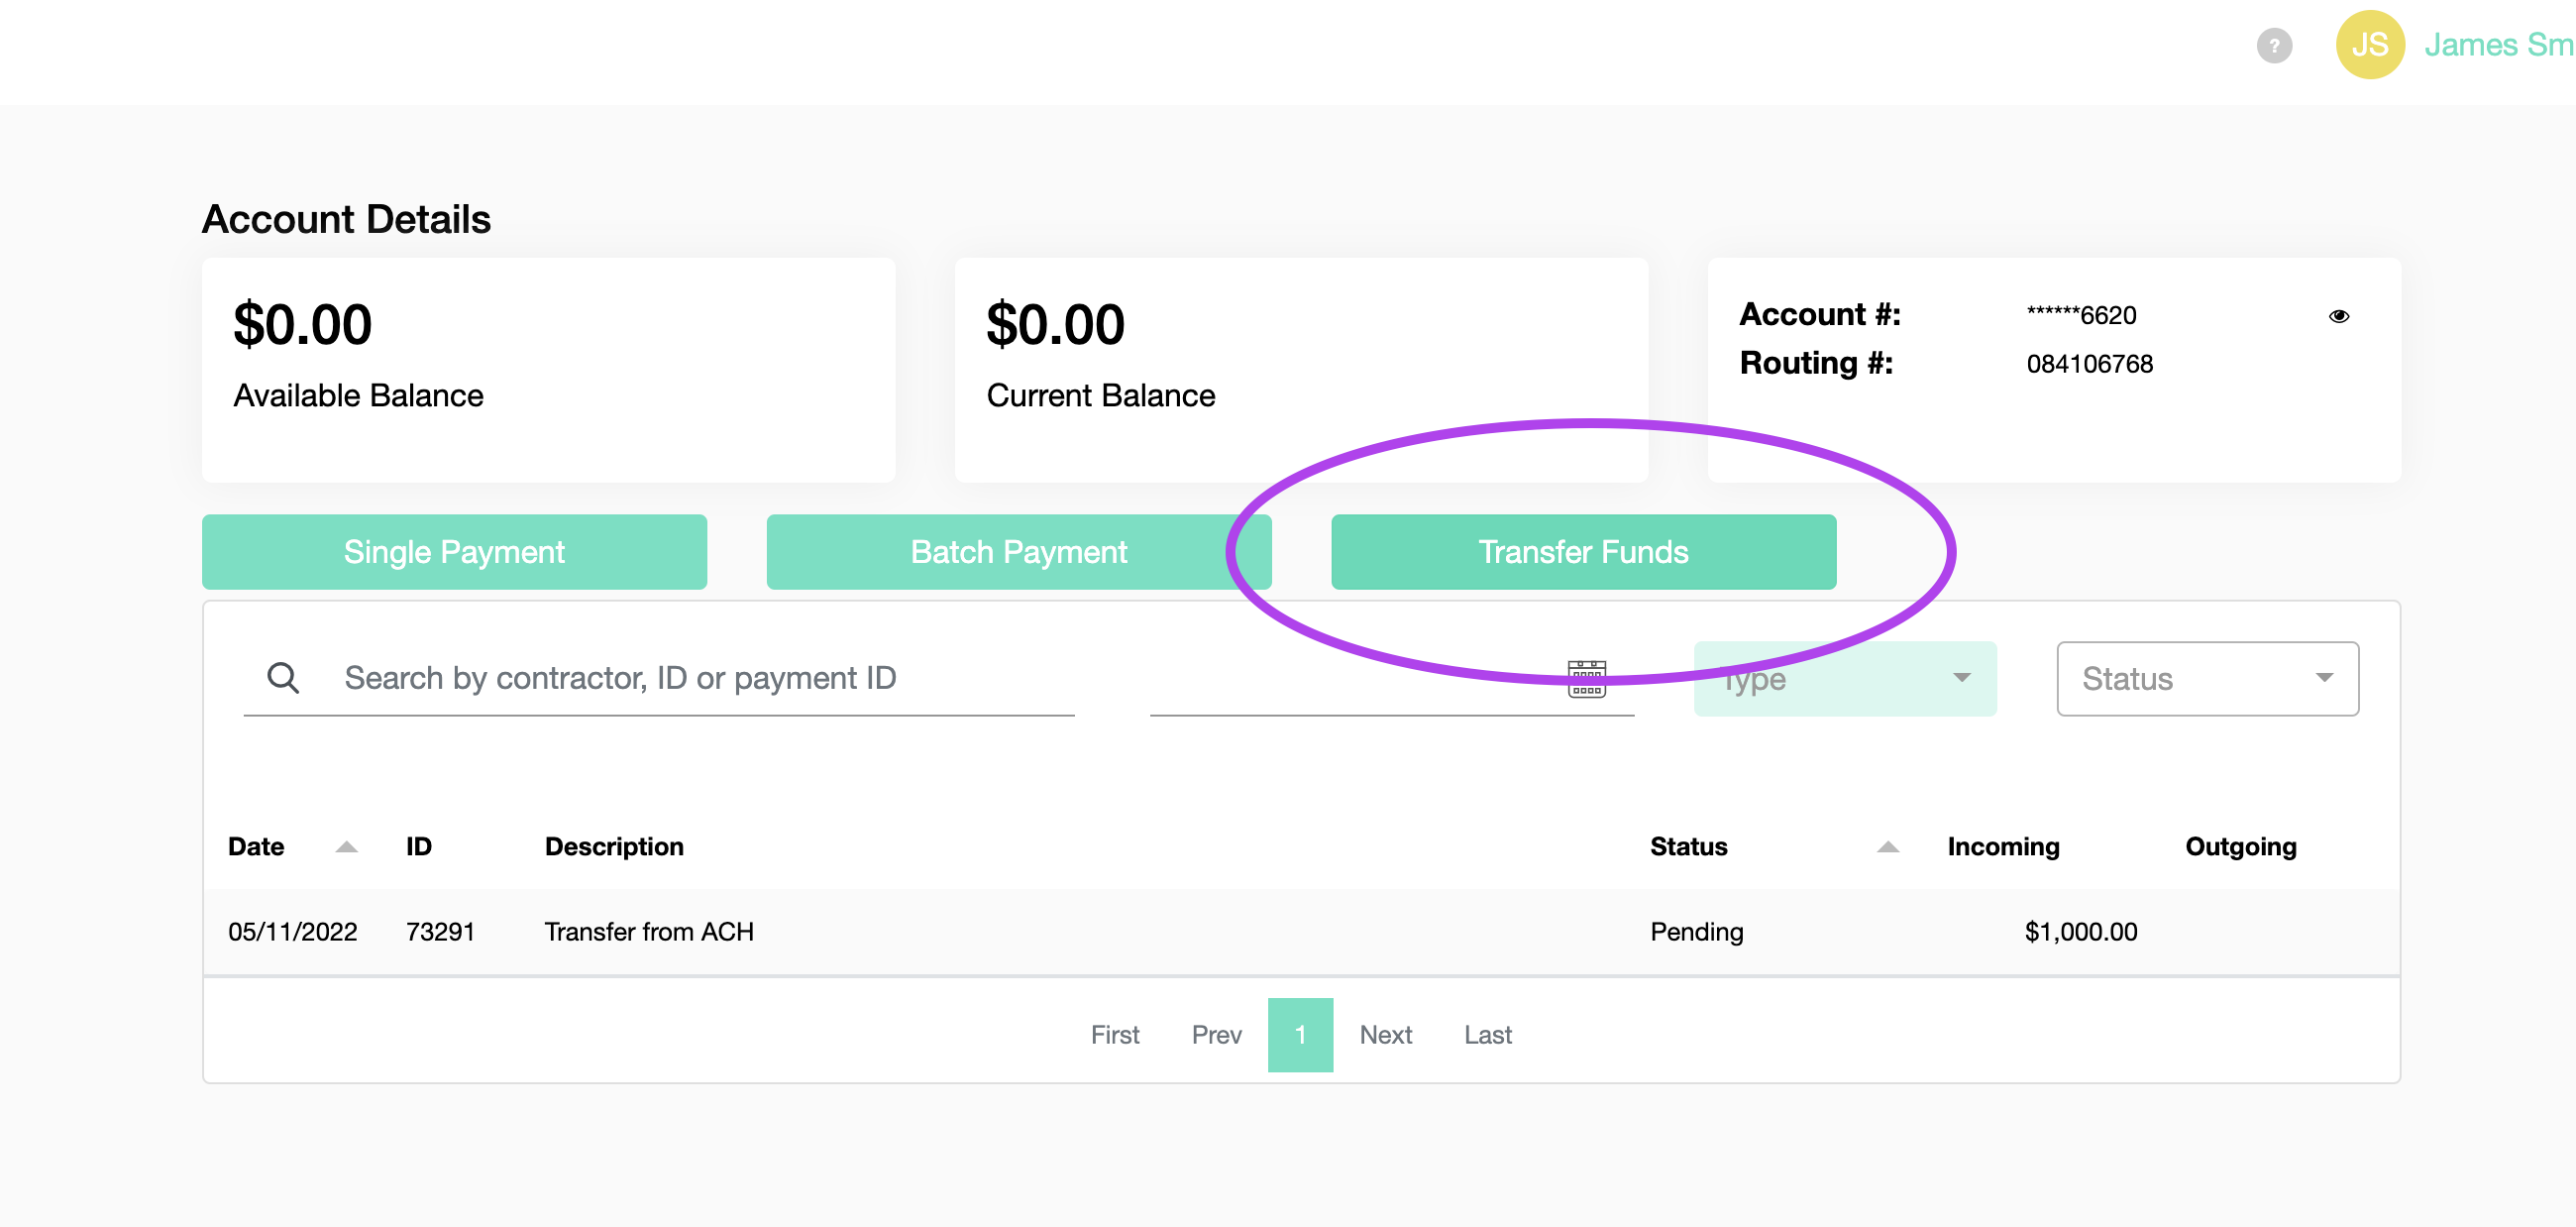
Transfer funds in-app
On Sandbox, funding your account involves transferring money from a pre-set up test bank account.

Navigate to your dashboard and select "Transfer Funds"

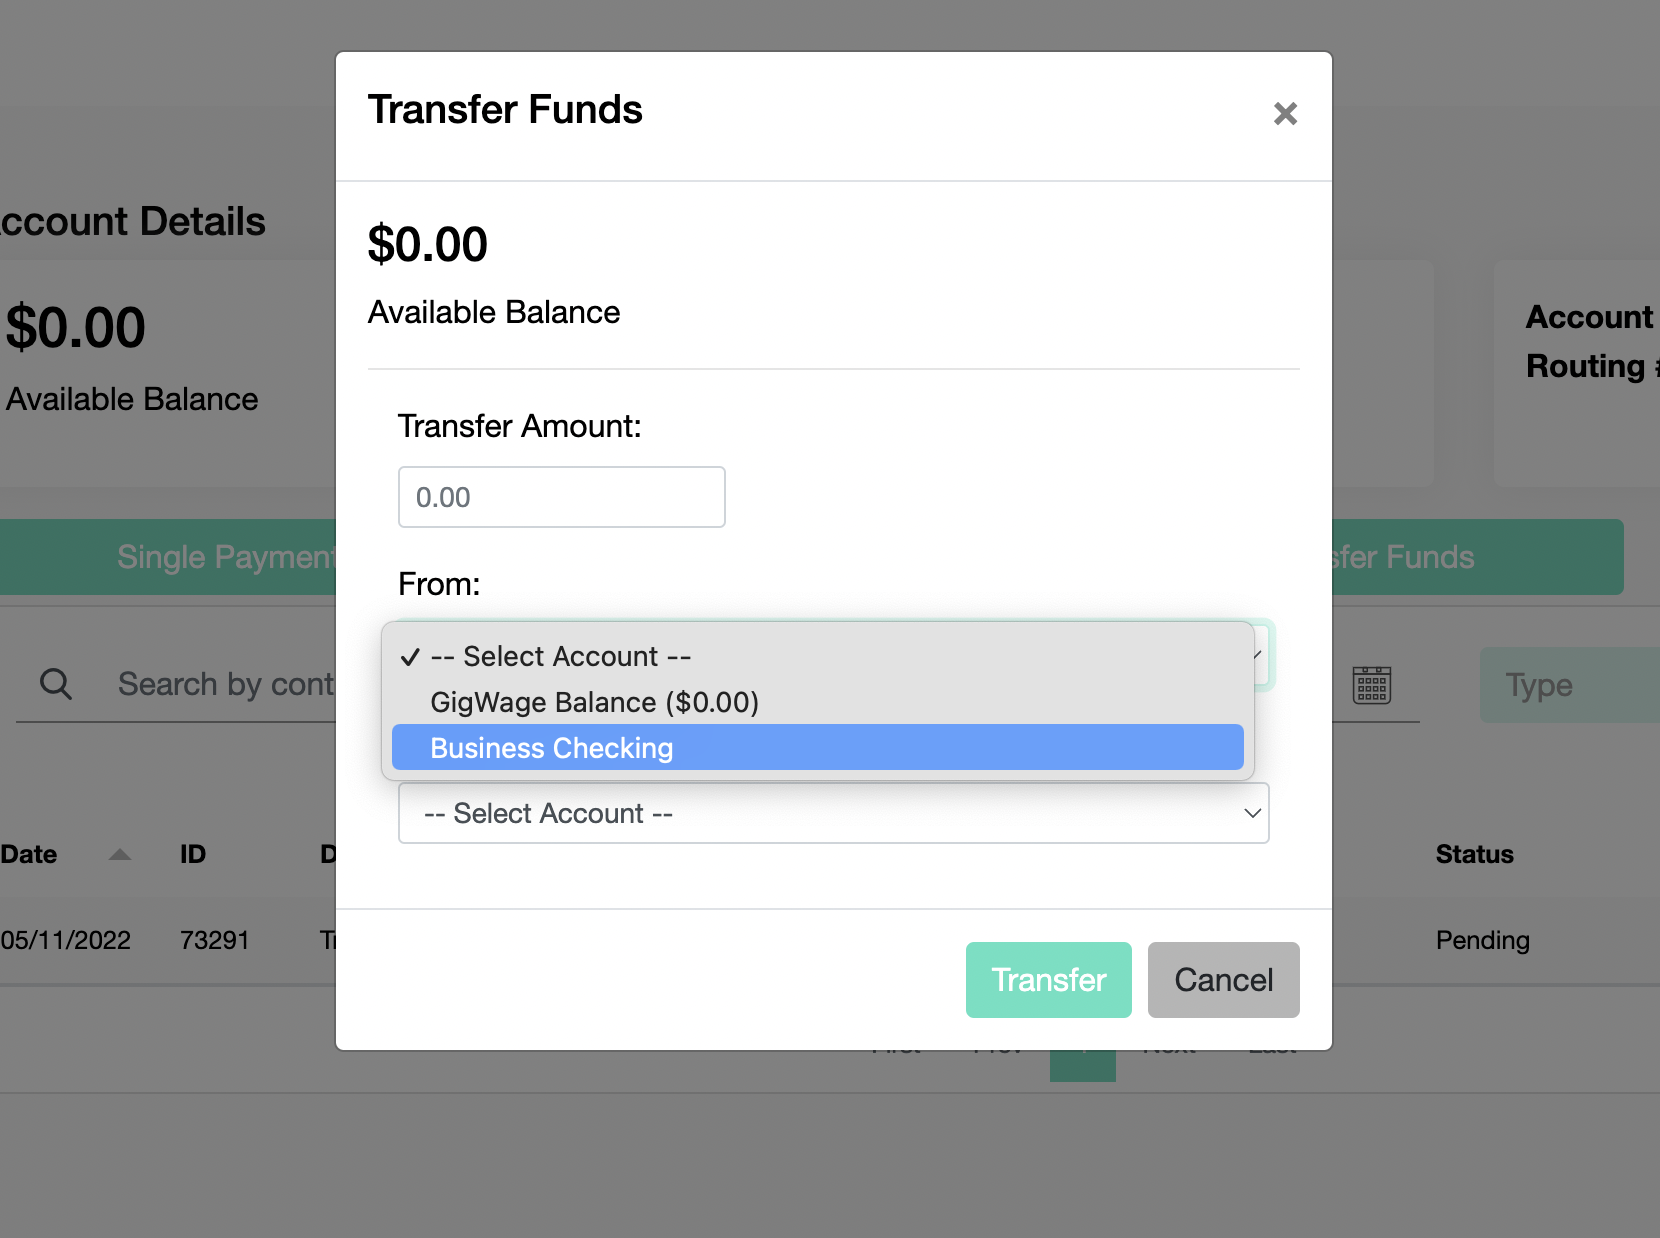
Select from Business account to your Gig Wage Balance. Add the amount you want to tranfer.
The Available Balance is the amount you have in your Gig Wage banking account to process payments with.
Transfer via API
Use the Create transfer endpoint to transfer money into your account.
Linking your real Bank account in Production
When you set up your Production Account, you will link your real business bank account and either transfer money in to make payments or have money transferred from your account at the time of each payment.
4. Create contractors
Creat a contractor
You will need to Create a contractor to process a payment to them. You only need their name and email initially. After this, the next step depends on your preferred workflow and integration design.
You can then:
- Simply create a payment to the new contractor. By default, this will generate and send an email invitation for the contractor to complete registration at gigwage.com, and your work is done.
- Submit the contractor’s KYC and banking details to the API, if you want to be in complete control of the contractor experience.
- Create an invitation email sent by Gig Wage to the contractor to complete registration.
- Generate an invitation URL for use in your own invitation message to the contractor.
Collecting KYC and W-9s
If you plan on making payments to a contractor, you will need to Submit KYC information. You can send an invite to the contractor to signup through Gig Wage, embed a KYC form in your sign-up flow, or populate this information from other sources.
If you plan to only file 1099s for a contractor, you will Submit W-9 information, to get the necessary information needed for their 1099.
5. Send a payment
Use the Send payment endpoint to send a payment to a contractor.
Contractors do not need to have KYC or W-9 information added when you send a payment
We will allocate the payment to the contractor and remove those funds from your available balance. When KYC is collected, the funds will then be released to your contractor.
6. 1099s
Gig Wage is for more than just Payments, manage your end-to-end 1099 process with Gig Wage, even if all of your payments were made outside of Gig Wage. 1099s will be submitted at the federal and state level, and there is an option to send paper copies to your contractors.
For contractors with Gig Wage payments
If you made payments through Gig Wage, those payments will automatically be included in a Draft 1099 on January 1st. You will need to check these 1099s and select 'Submit' to send them to the IRS. You don't need to interact with the API to submit your 1099s to the IRS.
Though you can access the PDFs of the 1099s you filed through the Get 1099 PDF URL endpoint.
For other contractors without Gig Wage payments
The 1099 process can be managed through an API with Create 1099 and Submit 1099 to IRS endpoints. You'll provide all of the payment information that you've made over the past year and we'll combine that with the W-9 information previously added to populate the 1099.
Checkout our 1099 Quickstart Guide to learn more about submitting 1099s.
7. Webhooks
You can set up subscriptions to webhooks.
Create a subscription
Manage your subscriptions with the Create subscription endpoint.
You can subscribe to webhooks to get updates about:
Updated almost 3 years ago